Friday, February 28, 2014

Bits and Bobs

It finally happened! I've been wanting a table for my sewing machines for a while now. At first I thought that I'd be able to make one myself by altering a table from Ikea. I looked at tons of tutorials online. I am a DIY kind of girl after all, and didn't want to spend the $$ on a fancy table. Well that all went out the window when my local store had a Superbowl sale. It was delivered the week before school vacation, so I haven't had much time to work on it, but check this out:


image

The inserts arrived a day or so after I took the photo, so I am really ready to roll now. I have a couple of projects in the works, and then I am planning to do some serious FMQ! I'm hoping that my posture will improve and my neck won't hurt now that I will be sitting in the proper position.

I have done a little work on my Pickle Dish. Lola was a good girl here, she knows not to sit on my quilt tops!

image


I also did another paper pieced star

image


And check out the sign that Nathalie found on Etsy. I got one for each of us. Just have to find a way to hang it on the door.

image


Sunday, February 9, 2014

Paper Piecing Craze

I've tried paper piecing in the past, and had some problems. When I made the pillow for the Riley Blake challenge, I can't tell you how many times I ripped pieces out. I couldn't wrap my head around which way to put the fabric onto the paper. After another challenge in my guild, its starting to come more naturally. Needless to say, since we had the challenge in our group, everyone has become mildly obsessed. Many of us have joined the Lucky Stars BOM.
I just finished making my first star, and thought I'd share.

I started by choosing colors with my trusty color wheel. Then, with my papers at the ready, I started piecing. It was a little confusing as to where to put which color, but I finally figured it out with minimal ripping.


The back was a little crazy with all of the seams. She recommends pressing them all open, but the center is still a disaster. Someone gave me a tip at our meeting yesterday, so will try that on the next one. 


Untitled

And here is the finished product, I'm very pleased. I thought I'd need a break, but I have already started choosing fabric for the next one. I'm addicted!

Untitled

Friday, February 7, 2014

What have I been up to

Even though I haven't been posting doesn't mean that I haven't been doing anything crafty. Did I mention that I started a chapter of the Modern Quilt Guild? We are called the Southern Connecticut Modern Quilt Guild, check out the blog

I've been sewing and knitting these days. I'm happy to report that I finished another sweater using my favorite yarn of all time, Plucky Knitter Traveller Sport. 


Its hard to see the color in my sunny kitchen, but its a lovely turquoise blue. The pattern is called Rolling Rock by Thea Coleman. 

I also got around to finishing my Pickle Dish, finally! I don't want to sew another curve for a long time!


Now I have to decide what to do with it. I'll probably use this as the center, and do some sort of border all around. I'll see what the girls at the guild meeting think tomorrow. Last but not least, I finished my Riley Blake Challenge for the Modern Quilt Guild. I made a big boo boo so ended up thread painting a star in the middle. Lets just say, make sure you are using water soluble marking pen before you mark your fabric! I won't be doing that again. 


Next project, paper pieced stars. Photos to come. 


Monday, January 6, 2014

Scrappy Quilt and Juki

A while back I purchased a couple of scrap bags at Denyse Schmidts sample sale. I've heard about her class, that she forces you to sew blocks together quickly, without thinking too much about fabric choices. Being a DIY kind of girl, I thought I'd give it a try on my own. I piled the fabrics on the table, quickly picked one or two, and went for it. The end result is a scrappy improv log cabin quilt.


Untitled

These are not my usual fabric choices, it was great to go outside the box. At one point I thought of cutting them all up and doing something completely different with them, but I like seeing each of them, that they are all different. It is very freeing to sew this way. I wanted to quilt it simply, the way Denyse does, with a figure 8. I had seen it done on the Stitched in Color blog, and of course mine are not nearly as perfect as that one. It was fun nonetheless.


image

This was the first project that I quilted on my fabulous new Juki 2010Q, what can I say except LOVE!!! My other machine is a Viking Sapphire 875Q. Let me start by saying that its a great machine, with more features for the money than any other out there. I cannot live with out the floating pivot. The only other machine that I have seen with that feature is the Bernina 750, and although I do covet that one, its super expensive. I was having problems doing FMQ on the Viking, can you say thread nests galore! I had read about the Juki, and for the price decided to go for it. I didn't have one problem the entire quilt, no re threading, or nests. It just hums along. Wow, its just amazing. Here she is in her glory


Untitled

It is a real treat to have two machines, they each serve different needs, and I'll be getting lots of use out of both of them. 

Its raining here today, hoping to get better shots of the finished quilt when the light is better. 

Saturday, December 7, 2013

Circle Time

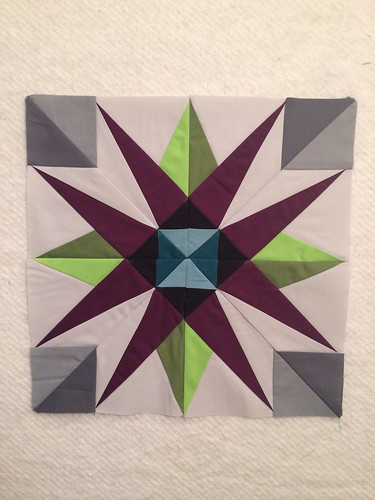
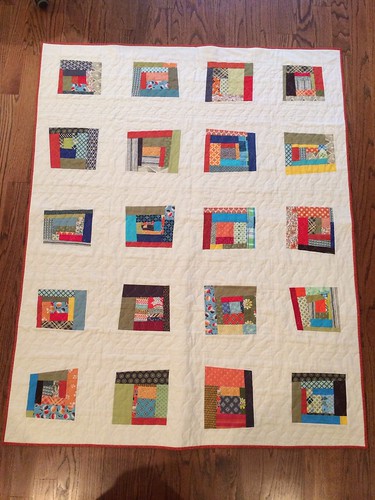
I'm in a circle craze. I've been interested in sewing curves for a while now. This month the guild's challenge is an inset circle block. It is our first challenge, and I was excited to try it out. I'd used freezer paper before, but only for appliqué. The method for this one is so much easier. I'm happy with the way my block turned out. It makes curved piecing look so easy!

Untitled

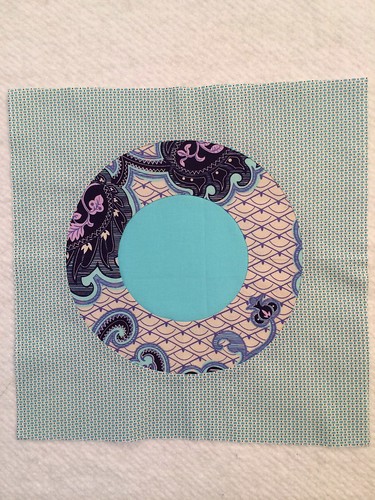
You can find the tutorial here.

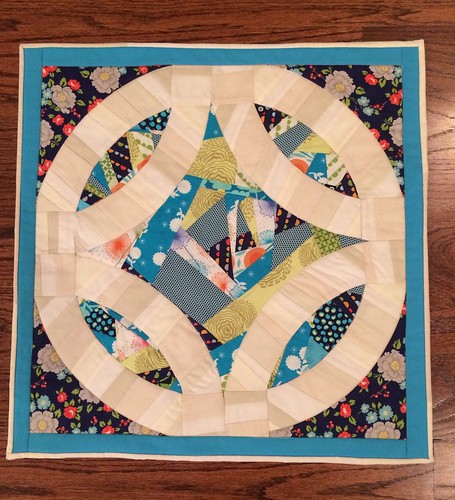
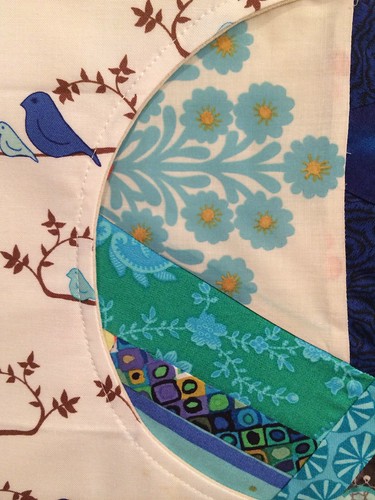
A friend then told me about the Porthole block by Lucie Summers. I'd never heard of her so decided to look her up. One of the best photos I found was of her Porthole Quilt, amazing is all I can say! I decided to give her method a try as well. This one is more of an appliqué, and the finished product is much thicker than a normal block, which makes it interesting.
I thought it would be fun to use some made fabric for the center of the Porthole. It was very quick and easy. No fussing with freezer paper and spray starch, but ends up with an entirely different look.


Untitled       Untitled


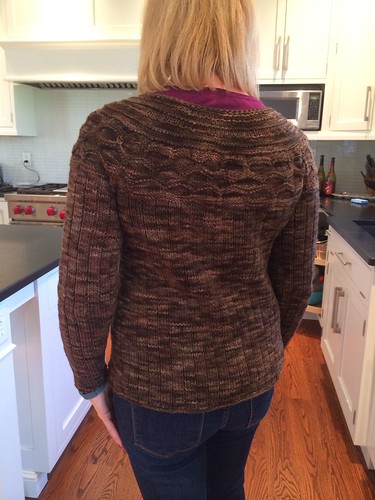
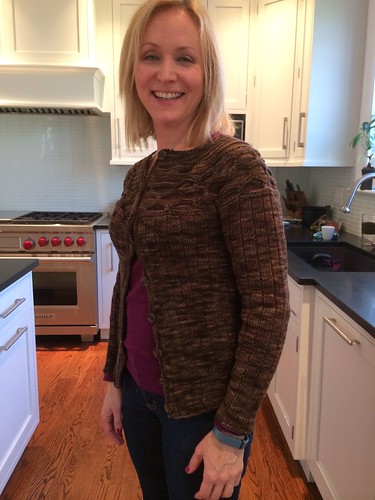
On another note, I have to mention that I've finally finished a sweater. Started this one last winter, and only had the button bands to finish. Now that the weather is getting colder, thought it was time. The pattern is Washington Square. I'm loving it!


Untitled          Untitled

Sunday, November 24, 2013

Toes In The Sand Progress

I've finally finished piecing my Toes in the Sand top. All thats left to do is put some sashing around it. The pattern calls for it only on the sides, but I've planned all along to have it all around. It will make it more balanced in my eyes.

I think this will be the last time that I follow a pattern for a quilt. I want to start being more creative, and unlike a sweater that has to fit someones body, a quilt doesn't. I enjoyed using the Hex And More ruler, and will definitely use it in the future. I'm also planning on doing some interesting quilting here, so it will be an exercise for me in that aspect. 

The big excitement with this project is that I will be using my fabulous new sewing machine to quilt it. More to come in a future post!


Untitled

Sunday, November 17, 2013

Double Wedding Ring Finished...again

I realized after posting yesterday that my DWR was actually larger than 20 inches square. I had to crop it and re-bind today. Here is the finished product, it is now 20 inches square. Oops!


Untitled